Rasipfon: Old rotary dial phone with raspberry pi
Short description
I got a wonderful old phone and wanted to recycle this phone.
On the net I found a project to convert a rotary phone to a sip phone (voip) with a raspberry pi from Harald Nesland with cool python code.
It was a good help to begin with the Rasipfon.

Hardware
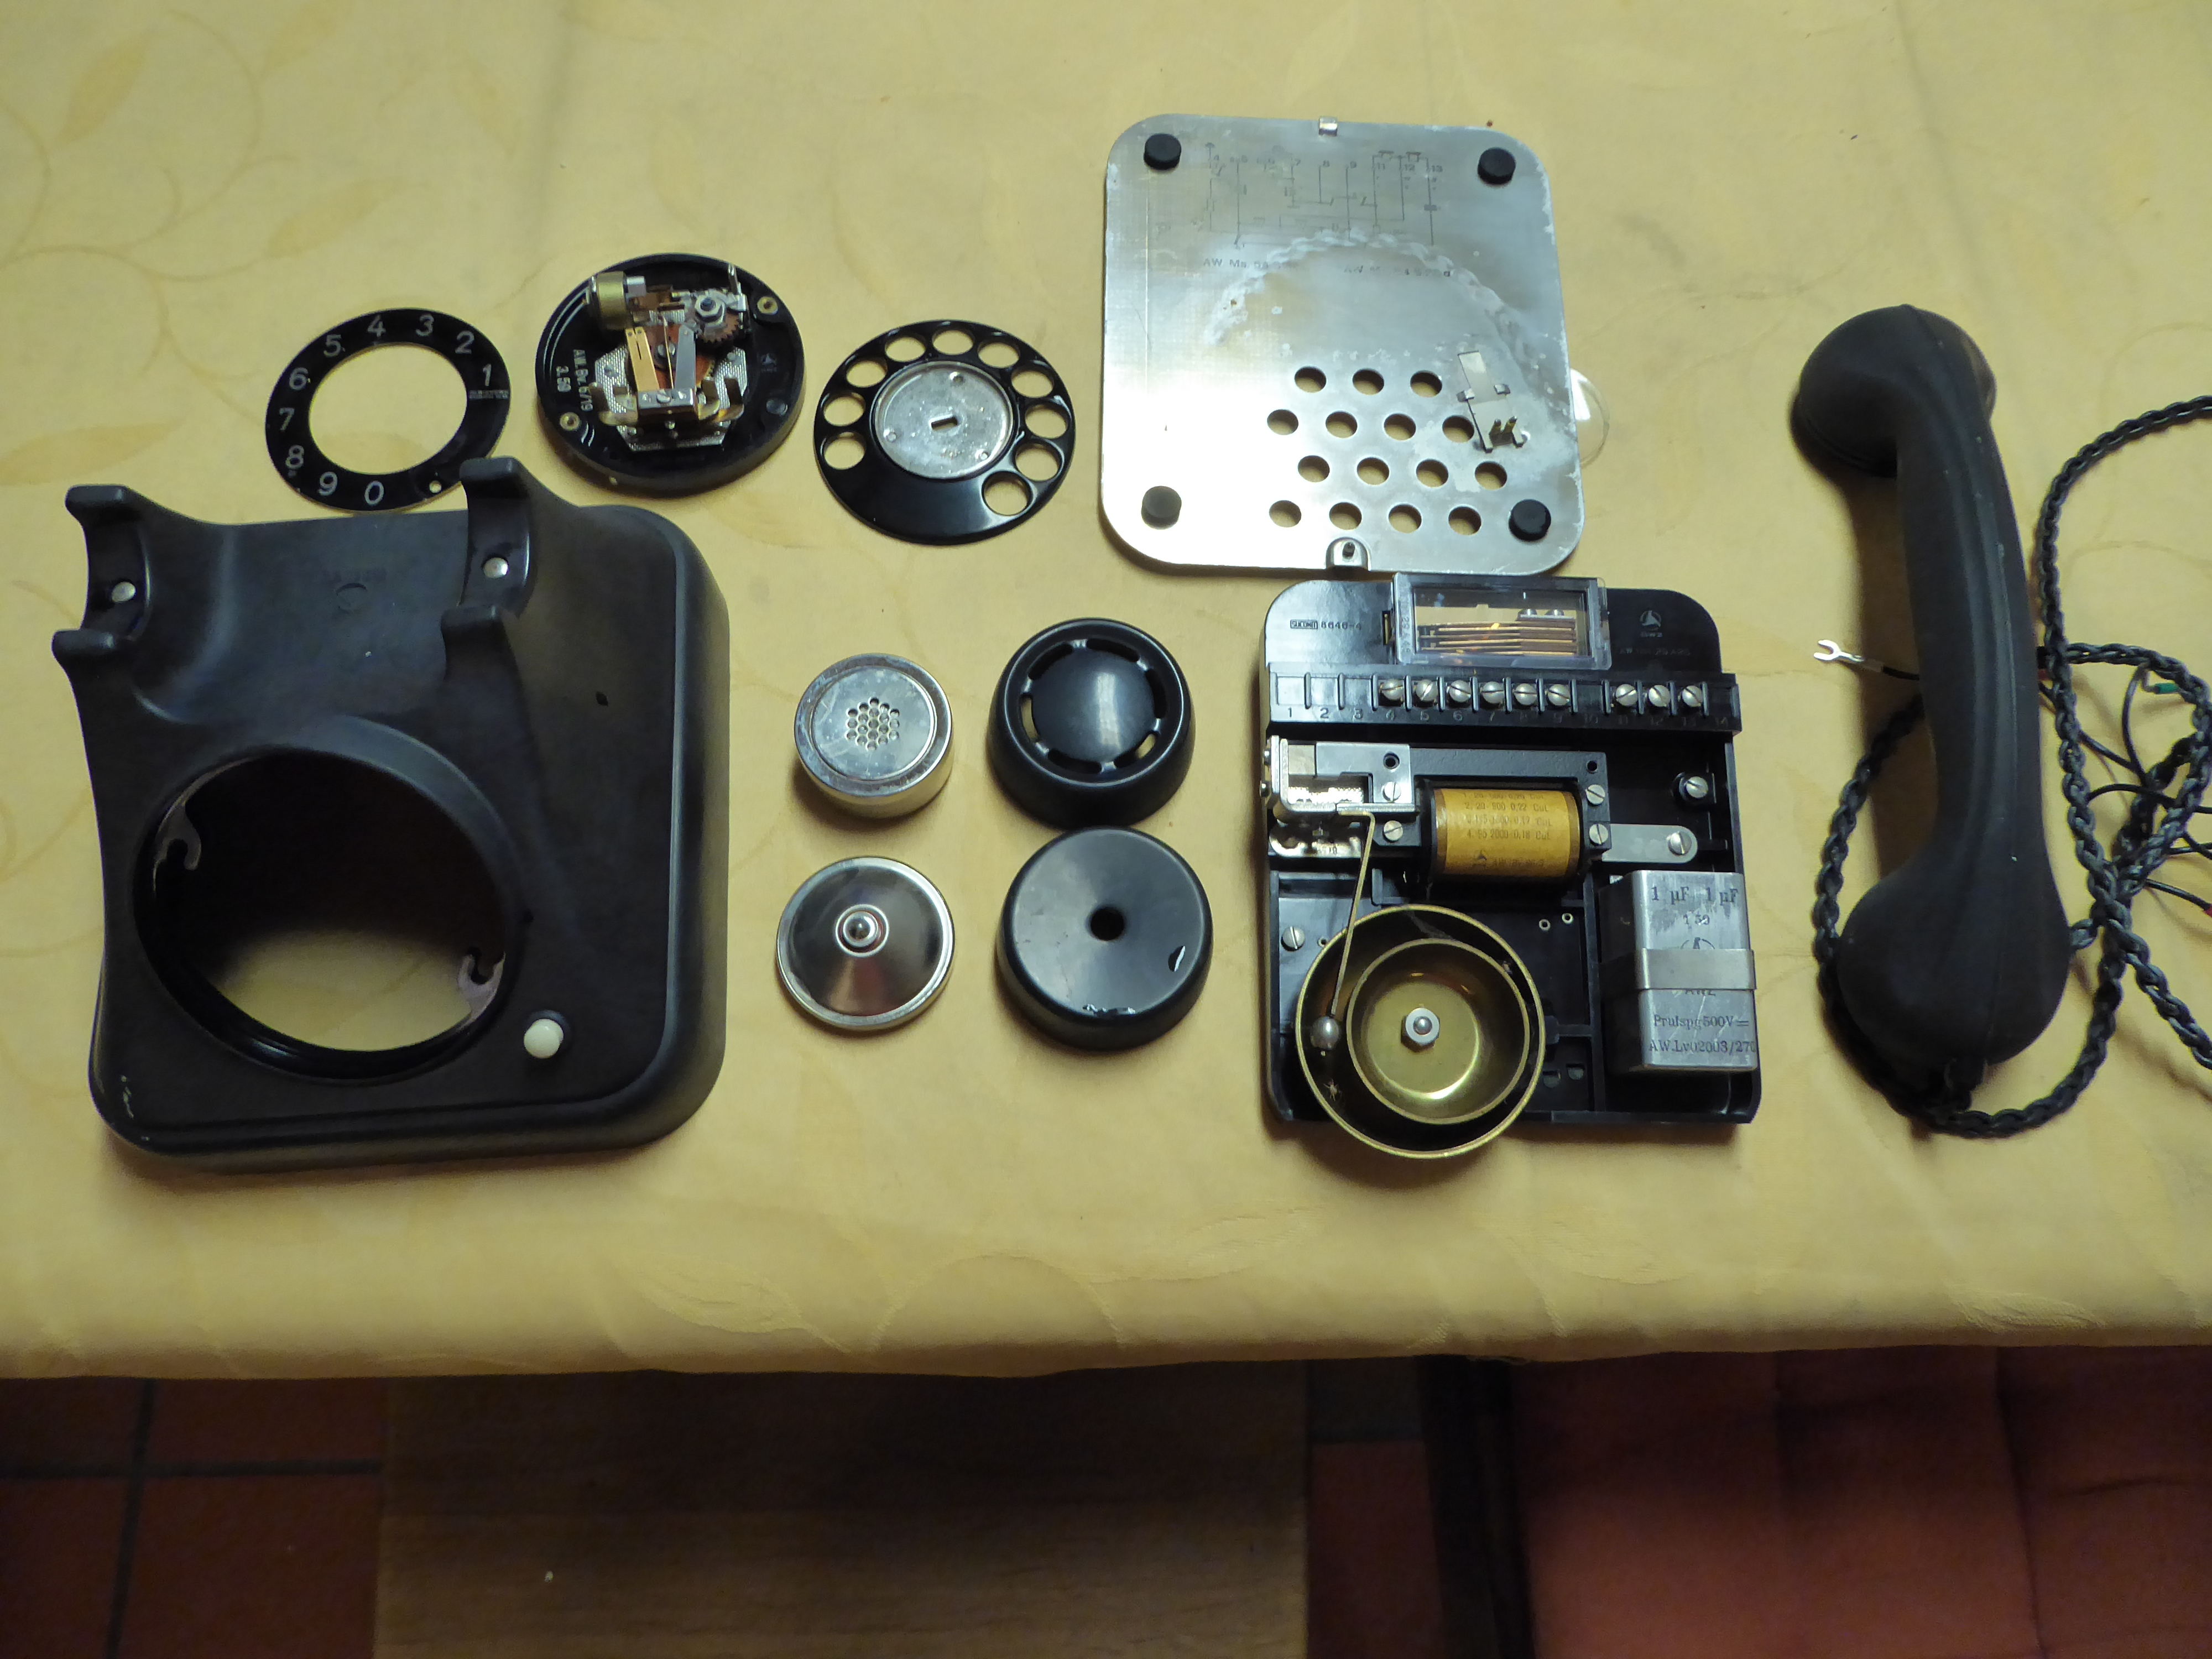
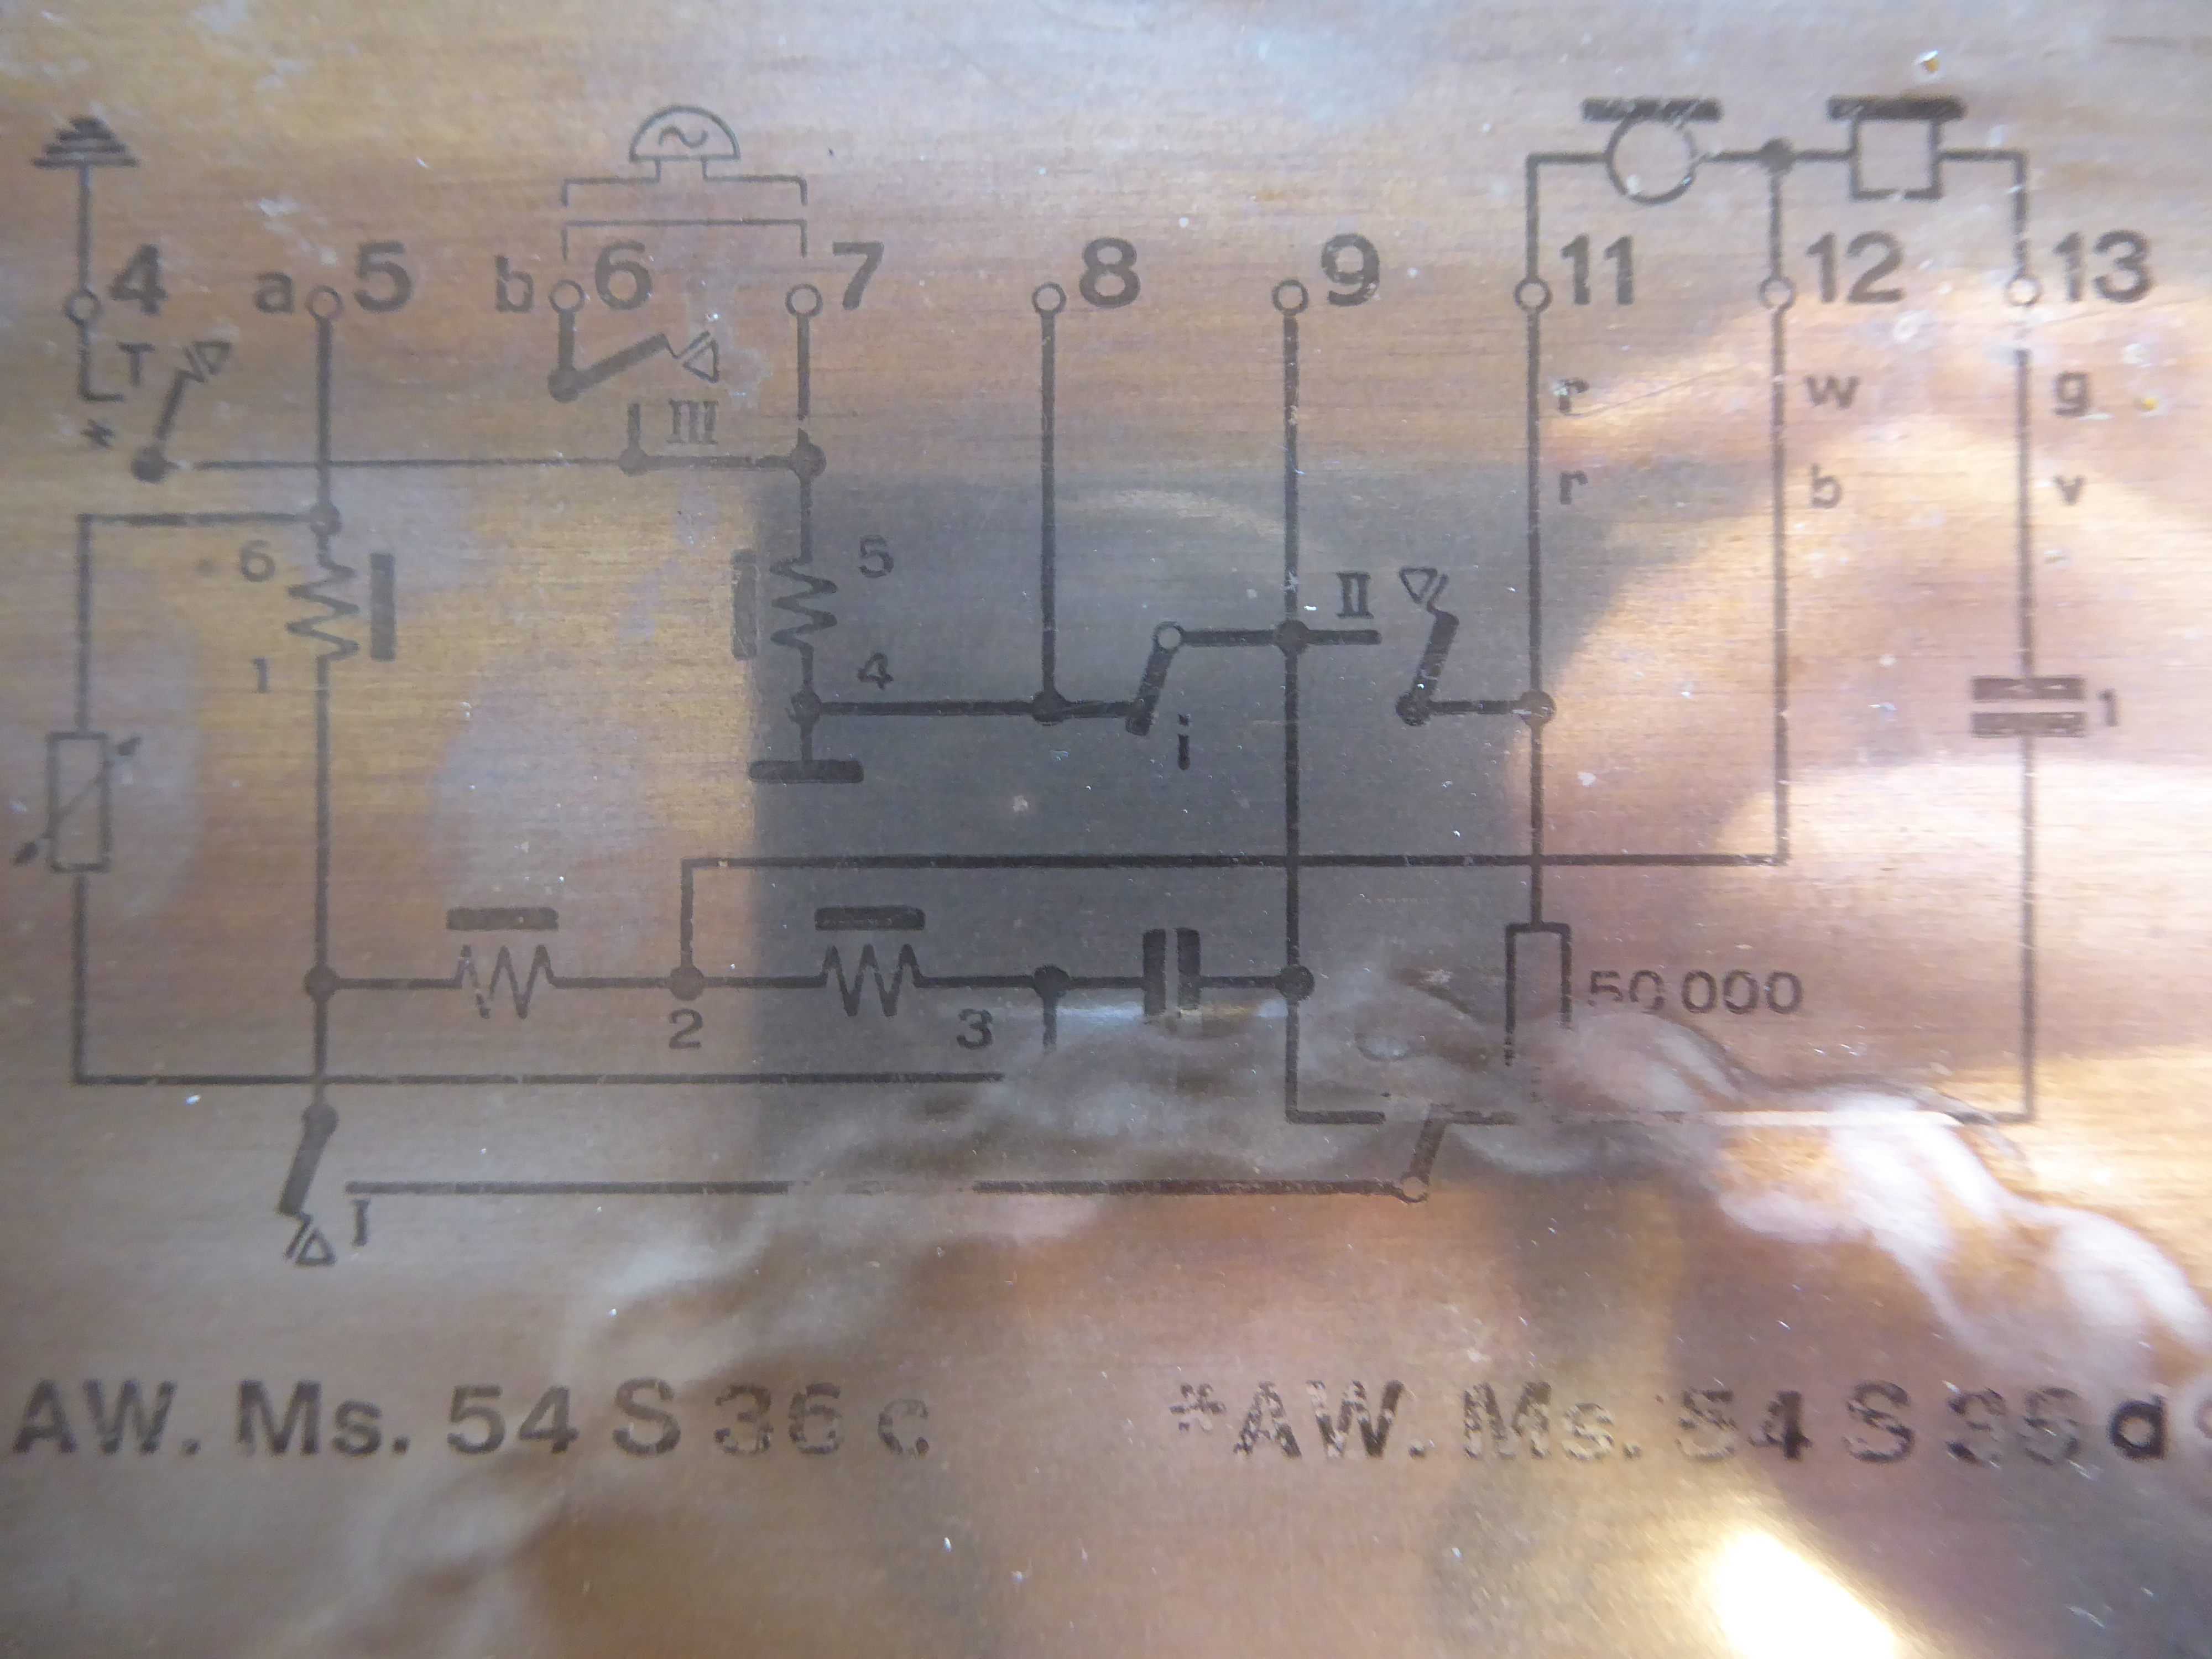
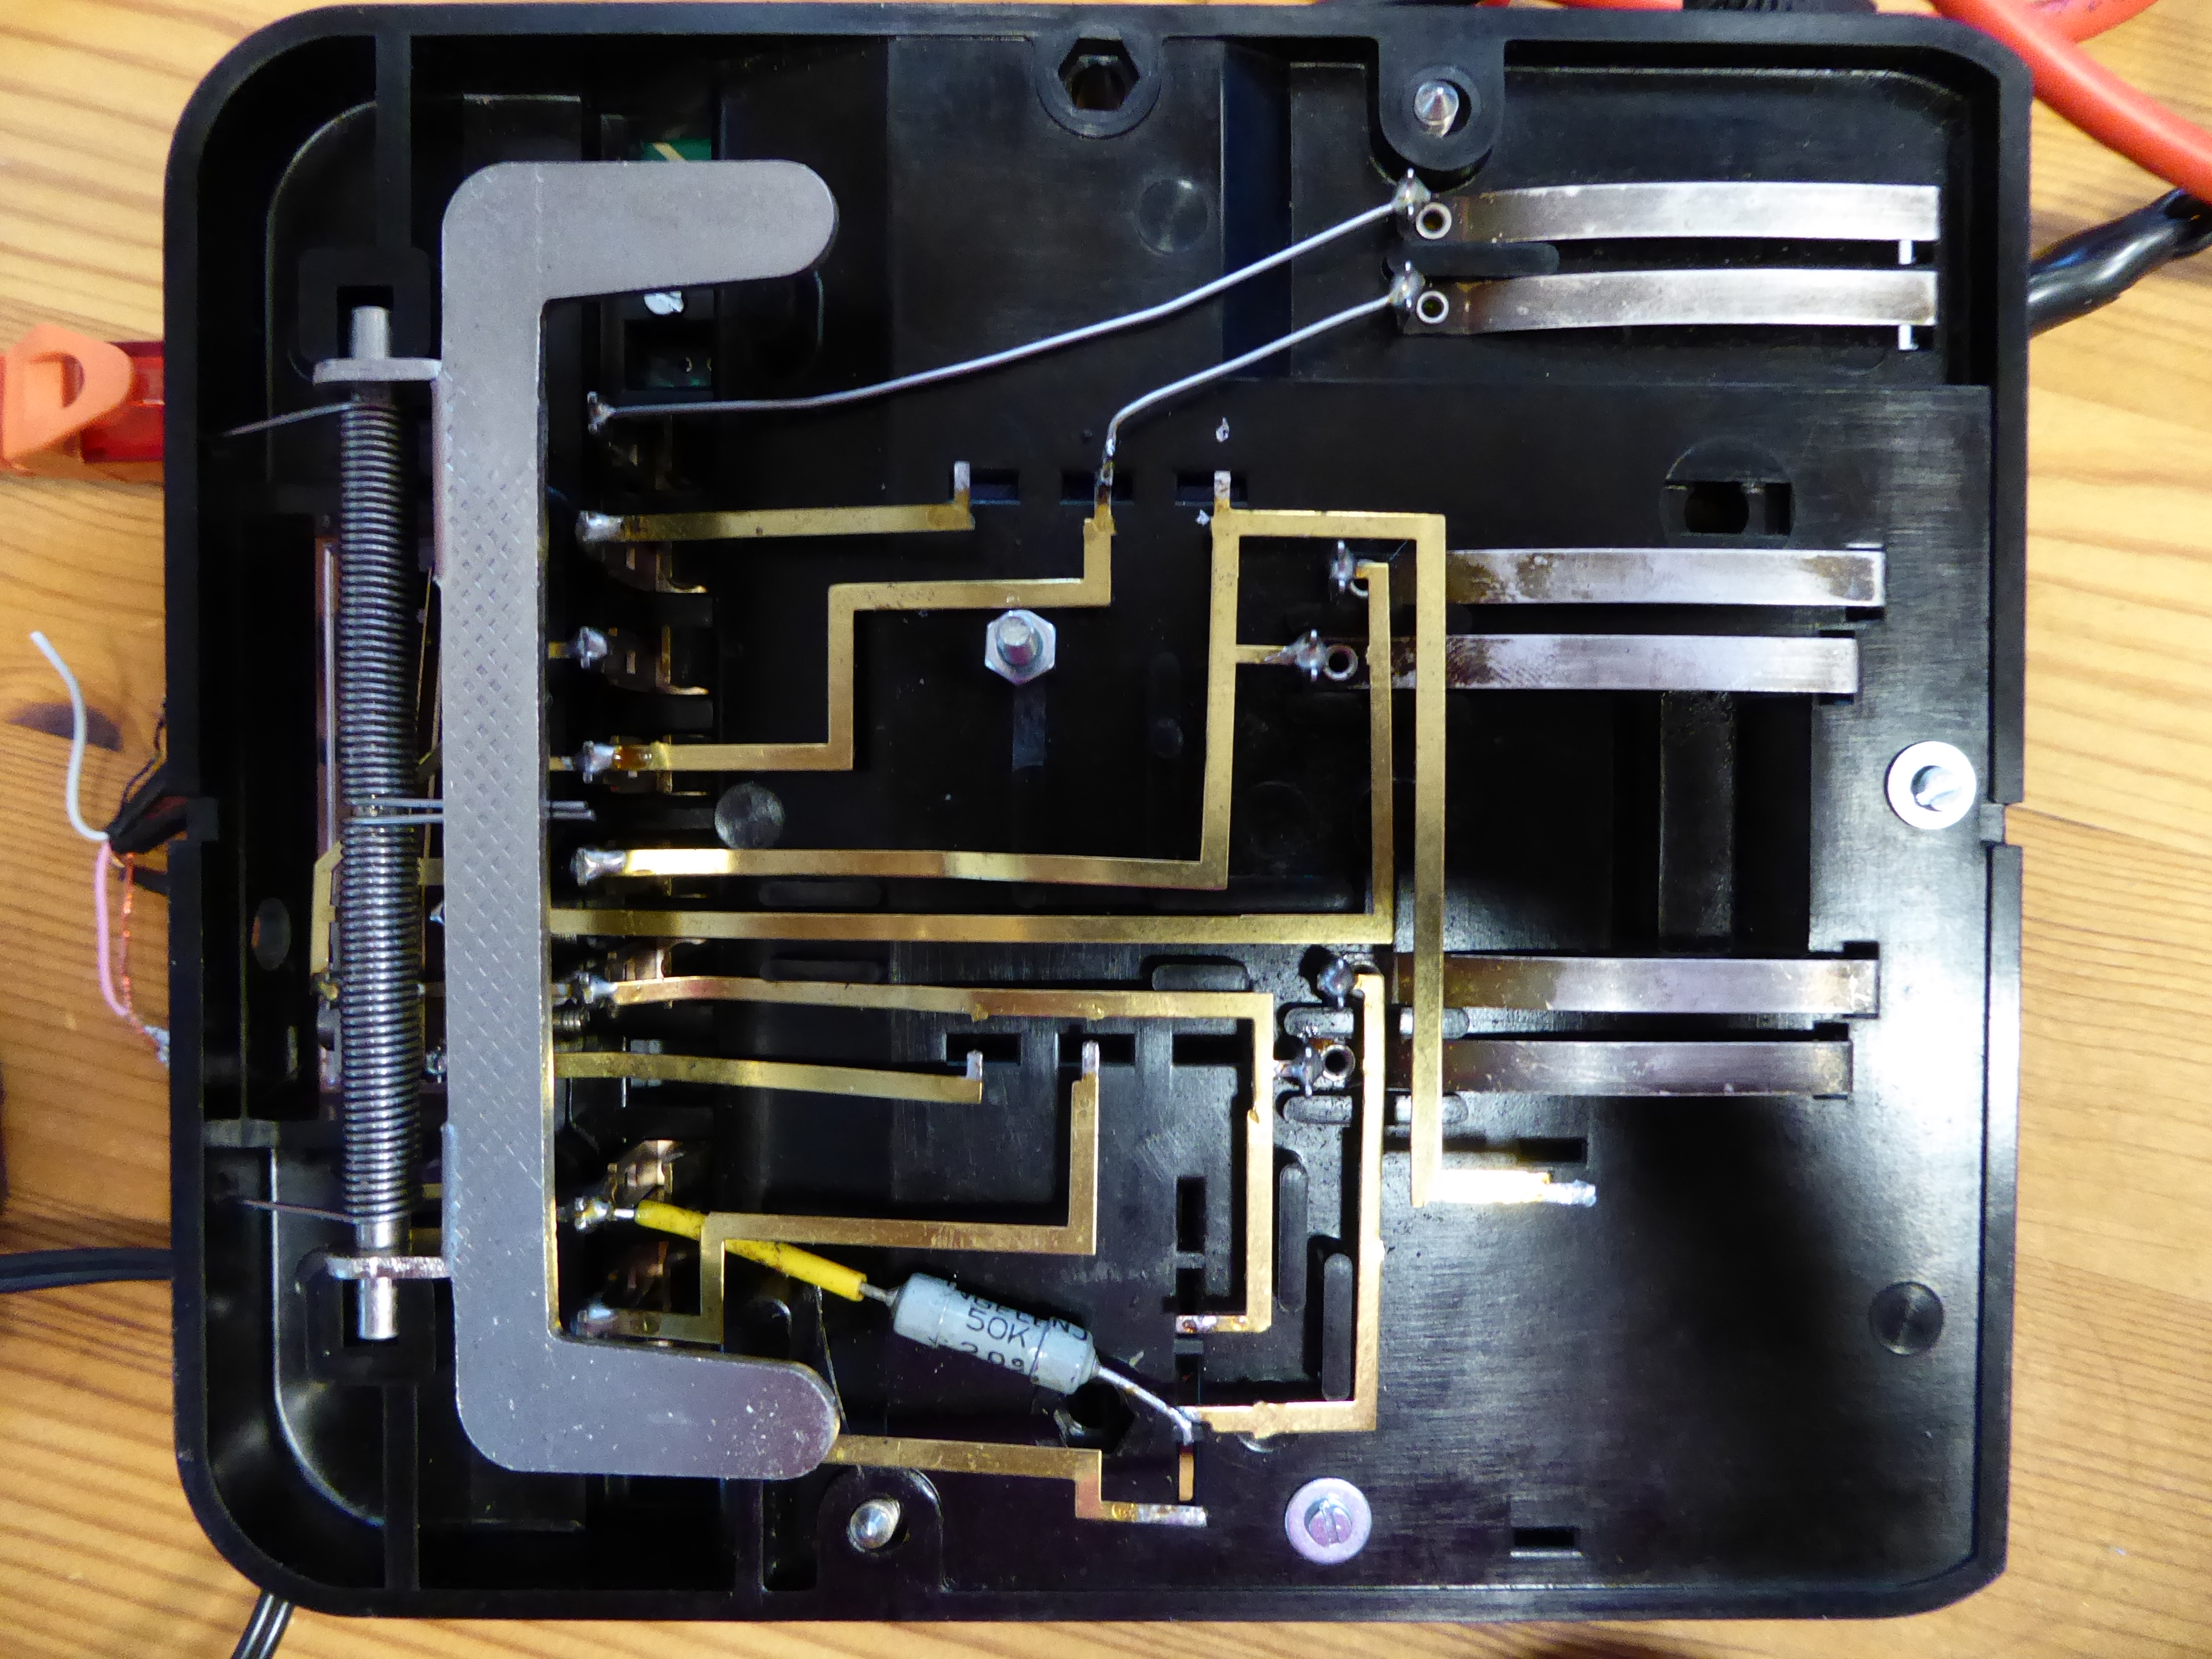
My phone is from Albiswerk Zürich AG (54S36c). I disassembled and cleaned the phone. Here some images:
I'm using a raspi2 with recent jessie image (07/16). For the handset a USB sound card is needed. I took one from EC Technology (amazon) and had to remove the aluminium case to fit it into the housing. The Rasipfon works with POE, so a POE adapter set injector passiv and a power supply (48V, 0.38A) is needed to provide the power (both amazon). A DC-DC concerter SCW12c-05 from Mean Well (mouser) gets the 5V for the raspi. Finally a D-class amp (TPA2016 from adafruit) amplifies the ring sound for a simple 8Ω speaker. The three switches from the phone (rotary, hook and a white pushbutton) are connected with pull-ups to the gpio of the raspi.


Configure the raspi2
SD card and login
Download Raspbian Jessie lite.
Burn an sd-card with:
sudo dd if=2016-03-18-raspbian-jessie-lite.img of=/dev/sde bs=1M
on Linux (for Windows use Google).
Connect your raspi and find his ip address with nmap.
nmap -sP 192.168.1.0/24
(If not installed use: sudo apt-get install nmap)
Log in with:
ssh pi@192.168.1.xxx
Confirm with "yes". The password is "raspberry". On Windows use putty or similar.
Update and raspi-config
After this we update with:
sudo apt update
sudo apt upgrade
sudo apt-get dist-upgrade
(drink a coffee during this process).
We install alsaaudio for python:
sudo apt-get install python-alsaaudio
Ans optionally the midnight commander and pip:
sudo apt-get install mc
sudo apt-get install python3-setuptools and python3-pip
With
sudo raspi-config
we expand the filesystem on the sd-card (1), change the host name to rasipfon (9 A2) and load the modules for I2C (9 A6).
After this we reboot
sudo reboot
and have to login again.
Fixed IP address
The next step is to configure a fixed ip address (don't use "etc/network/interfaces" with the new jessie image!)
If our gateway is for example 192.168.1.1 and we want a fixed ip address 192.168.1.91:
sudo nano /etc/dhcpcd.conf
add the following lines to the end of the file:
interface eth0
static ip_address=192.168.1.91/24
static routers=192.168.1.1
static domain_name_servers=192.168.1.1
after this:
sudo reboot
ssh pi@192.168.1.91
Install linphone and using it with a fritzbox
Install linphonec (linphone for console):
sudo apt-get install linphone
To use linphone, we have to register the phone with the fritzbox and setting it up. The following fritzbox link helps to do so. If your fritzbox is connected to a landline, you can use the telephone to conduct calls over the Internet as well as from your landline after setting it up. Her an abstract:
- Click "Telephony" ⇒ "Telephony Devices" ⇒ Click the "Configure New Device" button.
- Enable the option "Telephone (with or without answering machine)" and click "Next".
- Enable the option "LAN/WLAN (IP telephone)" give a name (ex:621) and click "Next".
- Enter a password and click "Next" (Registrar fritz.box (or fritzbox IP) name: 621 pw: rasipfon621@).
- Select the number to be used for making calls and click "Continue".
- Select the telephone numbers that the telephone should react to and click "Next" and then "Finish".
Testing linphonec:
linephonec
linephonec> register sip:621@fritz.box fritz.box password
linephonec> Registration on <sip:fritz.box> successful.
linephonec> call xxxxxx
Testing alsa
With
aplay -l
we see a list of playback hardware devices. Card 0 is the raspi and card 1 the usb audio card.
**List of PLAYBACK Hardware Devices ****
card 0: ALSA [bcm2835 ALSA], device 0: bcm2835 ALSA [bcm2835 ALSA]
card 0: ALSA [bcm2835 ALSA], device 1: bcm2835 ALSA [bcm2835 IEC958/HDMI]
card 1: Device [USB Audio Device], device 0: USB Audio [USB Audio]
To play a wav file on raspi audio out:
aplay ringtone.wav
To play a wav file on usb audio out:
aplay -D plughw:1,0 ringtone.wav
Recording on usb audio in:
arecord -D plughw:1,0 test.wav
Software
The software is written in python3. It consists of 3 modules and the main program rasipfon.py.
The modules have to be in the same directory as the main program. The audio and the gpio modules use timer threading (17.1.8. Timer Objects) to run in different threads. The wrapper module uses the software linphone, an open source SIP phone software, or more exactly linphonec the command line tool from liblinphone.
Using a config file
I want to use a good old config-file for my Rasipfon similar to the Windows ini-files one hundred years ago. Here is the content of the file:
[soundfiles]
startup  = /home/pi/rasipfon/ringtones/startup1.wav
shutdown = /home/pi/rasipfon/ringtones/shutdown.wav
ringtone = /home/pi/rasipfon/ringtones/vintage2.wav
busytone = /home/pi/rasipfon/ringtones/Old_North_American_busy_signal.wav
timeout  = /home/pi/rasipfon/ringtones/roh.wav
dialtone = /home/pi/rasipfon/ringtones/dialtone.wav

[sip]
username = 621
password = xxx
hostname = fritz.box
port     = 5060
Gratefully there is a python module to simplify the task. Here the code to print an item from my config-file in python3:
#!/usr/bin/env python3
# -*- coding: utf-8 -*-
# rasipfon_test_config_py3.py

from configparser import SafeConfigParser # ConfigParser py2, configparser py3

parser = SafeConfigParser()               # get data from config file
parser.read('rasipfon.conf')

print(parser.get('soundfiles','startup')) # print data
Testing the switches and the push-button
A very basic program to test the connections of the hook-switch, the rotary switch and the push-button (python3):
#!/usr/bin/env python3
# -*- coding: utf-8 -*-
# rasipfon_ring.py

import RPi.GPIO as GPIO

GPIO.setmode(GPIO.BCM)

pin_rotary = 25
pin_hook   = 24
pin_pushb  = 23

GPIO.setup(pin_rotary, GPIO.IN)
GPIO.setup(pin_hook, GPIO.IN)
GPIO.setup(pin_pushb, GPIO.IN)

try:
    while True:
        if GPIO.input(pin_rotary):
            print('Rot HIGH\t',end='')
        else:
            print('Rot  LOW\t',end='')
        if GPIO.input(pin_hook):
            print('Hook HIGH\t',end='')
        else:
            print('Hook  LOW\t',end='')
        if GPIO.input(pin_pushb):
            print('PB HIGH')
        else:
            print('PB  LOW')
# ctrl+c
except KeyboardInterrupt:
    print("\nStopped with keyboard interrupt!")
    GPIO.cleanup()
Using audio
On the raspi we are using alsa for audio generation. Her a little program to use raspi audio (cardindex 0) for the ringing and audio out from the usb card (cardindex = 1) to play headset files.
#!/usr/bin/env python3
# -*- coding: utf-8 -*-
# rasipfon_test_audio.py

import alsaaudio
import wave
from configparser import SafeConfigParser # ConfigParser py2, configparser py3
import smbus # needed for i2c Stereo 2.8W Class D Audio Amplifier TPA2016

port = 1                # i2c port = 1 for rev 2
bus = smbus.SMBus(port)
ampAddr = 0x58       # TPA2016 address

td = [0x00, 0x80, 0x00, 0x00, 0x00, 0x1E, 0x80, 0xC0]  # set gain from i2c chip
bus.write_i2c_block_data(ampAddr, 0, td)

parser = SafeConfigParser() # get data from config file
parser.read('rasipfon.conf')
file = parser.get('soundfiles','startup')

wav = wave.open(file)

aRpi = alsaaudio.PCM(cardindex=0)
aRpi_mix = alsaaudio.Mixer(control='PCM',cardindex=0)
aRpi_mix.setvolume(100)
aRpi.setchannels(wav.getnchannels())
aRpi.setrate(wav.getframerate())
aRpi.setperiodsize(320)

aUsb = alsaaudio.PCM(cardindex=1)
aUsb_mix = alsaaudio.Mixer(control='Speaker',cardindex=1)
aUsb_mix.setvolume(70)
aUsb.setchannels(wav.getnchannels())
aUsb.setrate(wav.getframerate())
aUsb.setperiodsize(320)

data = wav.readframes(320)
while data:
    aRpi.write(data)
    data = wav.readframes(320)
wav.rewind()
data = wav.readframes(320)
while data:
    aUsb.write(data)
    data = wav.readframes(320)
wav.rewind()
wav.close()
The next test program is using the Rasipfon audio module. This module is using threading (17.1.8. Timer Objects) and runs as second process.
#!/usr/bin/env python3
# -*- coding: utf-8 -*-
# rasipfon_test_audio_m.py (open with python3)

from time import sleep
from configparser import SafeConfigParser # ConfigParser py2, configparser py3
from rasipfon_audio import Audio

playtime = 2 # in seconds

parser = SafeConfigParser() # get data from config file
parser.read('rasipfon.conf')

Audio = Audio(parser)
Audio.playfile(parser.get('soundfiles','startup'))
# Ring (Raspi Audio out)
Audio.startring()
sleep(playtime)
Audio.stopring()
sleep(1)
# Handset (USB Audio)
Audio.starthandset(parser.get('soundfiles','dialtone'))
sleep(playtime)
Audio.stophandset()
sleep(1)
Audio.starthandset(parser.get('soundfiles','busytone'))
sleep(playtime)
Audio.stophandset()
sleep(1)
Audio.starthandset(parser.get('soundfiles','timeout'))
sleep(playtime)
Audio.stophandset()
Download
Rasipfon.py needs 3 modules (rasipfon_audio.py, rasipfon_gpio.py and rasipfon_linphone_wrapper.py), a config-file (rasipfon.cond) and some ringtones. All three modules use threading.

Download rasipfon.zip:
Start Rasipfon with cron
Add the following line to your crontab file in the etc directory of your Raspi.
@reboot pi /bin/sleep 10 && cd /home/pi/rasipfon && /usr/bin/python3 -u rasipfon.py >> /home/pi/rasipfon.log
